How to Record a Podcast Remotely with Zoom
A Step-by-Step Guide
Transistor Team
Here's how to record remote podcast guests (or a co-host) using Zoom so you get the best audio quality.
Zoom can be an excellent tool for podcast recording. Here are some basic tips and settings to get the most out of Zoom for your podcast recording.
Step 1: Equipment You Need
First, you'll need a good microphone. It is important to avoid using the built-in computer microphone to prevent the sound from your speakers from bleeding into the recording. You'll also need a pair of headphones and a good microphone.
Step 2: Setting up Audio in Zoom
In Zoom, go to the settings and start with audio.
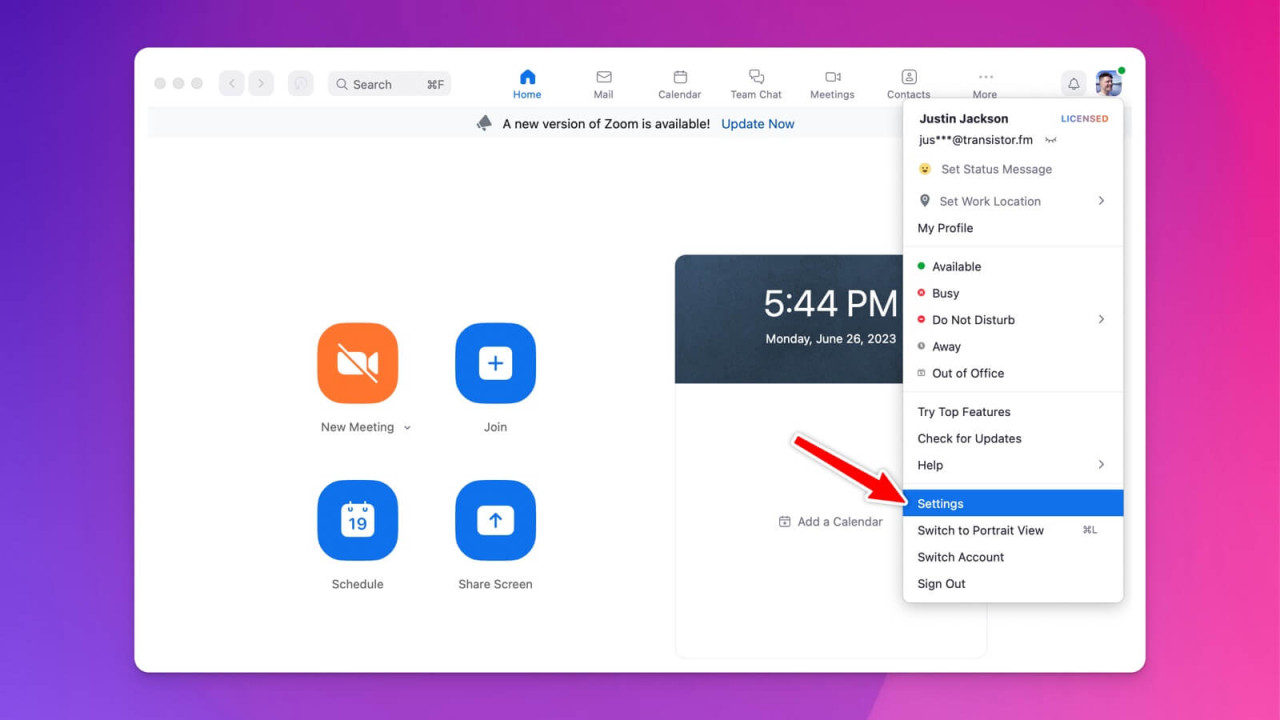
If you're using a microphone that runs into an audio interface, you can allow Zoom to adjust the microphone volume automatically.
Alternatively, you can uncheck this option for manual control over your microphone or sound interface settings.
Step 3: Choose your Audio Profile
Depending on the quality of your recording environment, you might want to experiment with the 'Original Sound for Musicians' setting.
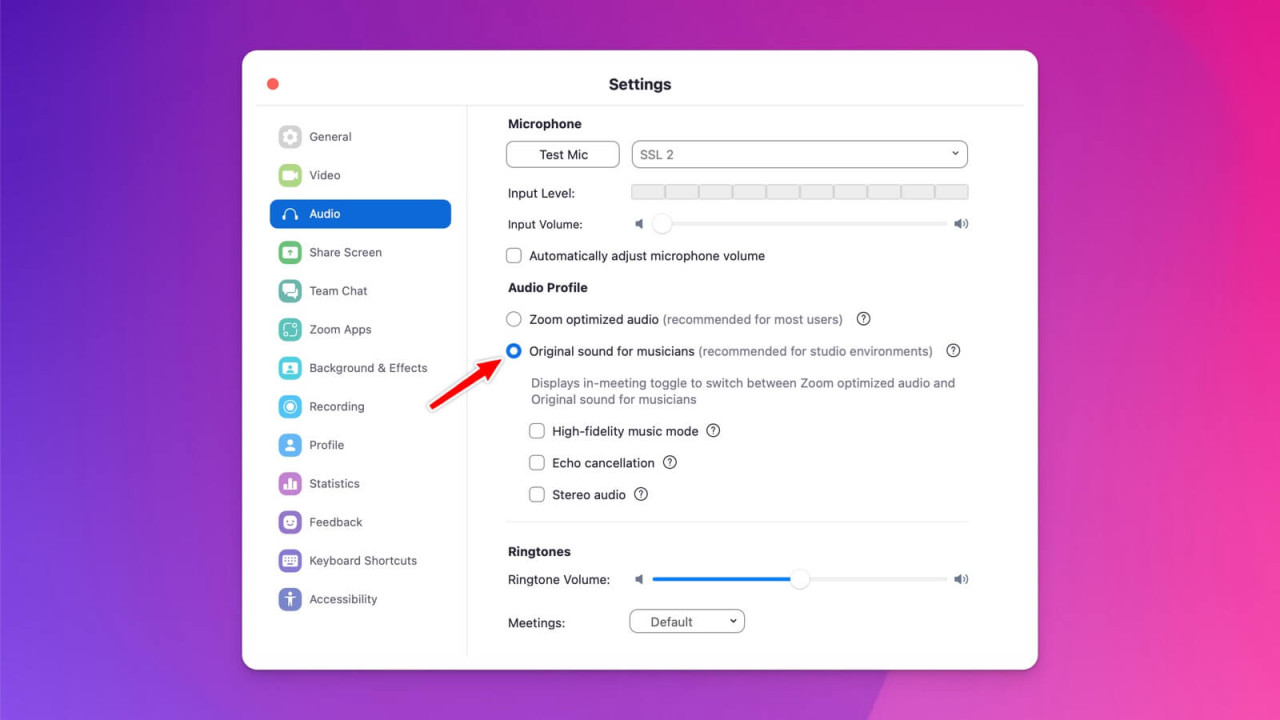
Choose this setting if you have a quiet place with soundproofing, such as a closet surrounded by clothes or a studio. Furthermore, uncheck the' Echo Cancellation' box if you're using headphones and a microphone because you won't need the built-in echo cancellation.
Step 4: Changing the Recording Settings
Navigate to the 'Recording' section in settings, and choose 'Record a Separate Audio File for Each Participant.'
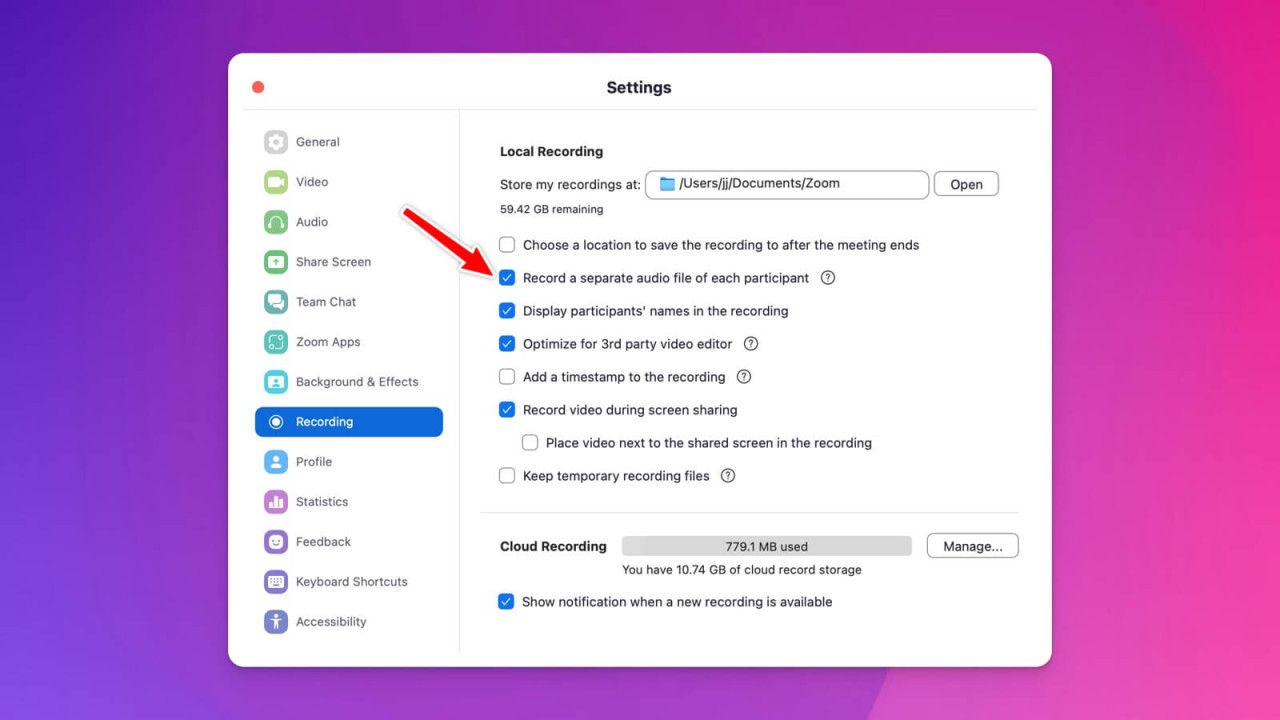
This setting ensures you have individual audio files for each participant, simplifying the editing process later.
Step 5: Initiating the Zoom Meeting
After you've adjusted the settings, create a new meeting and ensure you've selected the correct microphone.
If you want to export clips to YouTube or publish teasers on social media platforms, consider recording the video as well. Then invite the guest to the call.
Step 6: Recording the Podcast
Start recording the podcast by clicking on the 'Record' button in Zoom. You have the option to record either to the cloud or your computer.
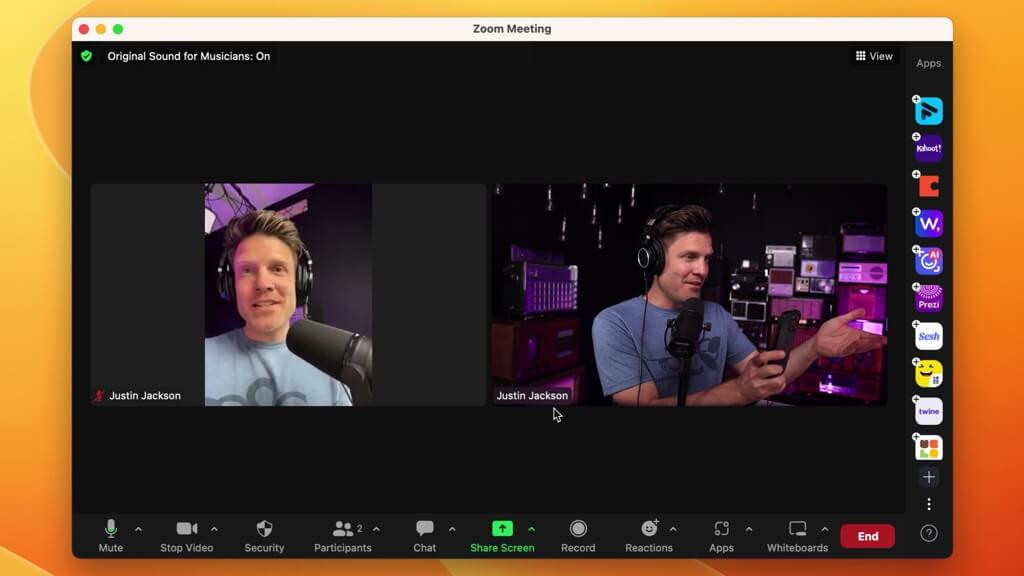
Carry on the interview until it's done.
Step 7: Ending the Recording and Downloading the Files
At the end of the recording, click 'Stop Record,' say goodbye to your guest, and end the call. Once you've stopped the recording, Zoom will send you a message indicating the recording is available.
Download the recording.
Step 8: Editing the Audio Files
After downloading the files, you'll have separate audio tracks for each speaker. These can be edited individually for optimum audio quality. For instance, you might want to adjust the volume or normalize the tracks. Once the editing is done, export it as a single audio file.
Step 9: Publishing Your Podcast Episode
To publish the podcast episode, head over to your podcast hosting provider (for instance, Transistor), click 'New Episode,' and upload the episode you've just edited from Zoom.
Save and publish it, and your episode will be sent out to all of your subscribers, and people can find it on platforms such as Apple Podcasts, Spotify, and Google Podcasts, depending on where you distribute your show.
As long as you tweak the settings as mentioned above and ensure that each guest is connected to Zoom with a microphone and headphones, you can get a high-quality recording. Zoom is indeed a fantastic tool for podcast recording when used correctly. Happy recording!
