How to receive voicemail and video messages from podcast listeners using Transistor & ZipMessage
Transistor Team
Believe it or not, hosting a podcast can feel pretty lonely sometimes.
I often wonder, is anyone even listening to my podcast? If so, I want to hear from them! Wouldn’t it be great if I had a direct line where my listeners can submit their questions or requests to me?
Even better: I’d love to—literally—hear from my listeners. After all, they hear and see me when I publish my podcast every week. Why shouldn’t I be able to hear, or even see them?
I want to direct listeners to a page on my podcast website where they can simply click a button, then record and submit their message to me using their microphone and (optionally) their camera. I’ll receive their question and I reply back to them with a video or audio message of my own—a real conversation with my audience.
This could be a fantastic source of material for my podcast. Maybe I can even record an entire podcast asynchronously! 🤯
So check it out:
I wired up my listener feedback recorder in 2 minutes using my Transistor podcast website and my ZipMessage video intake form.
You can see it live here.
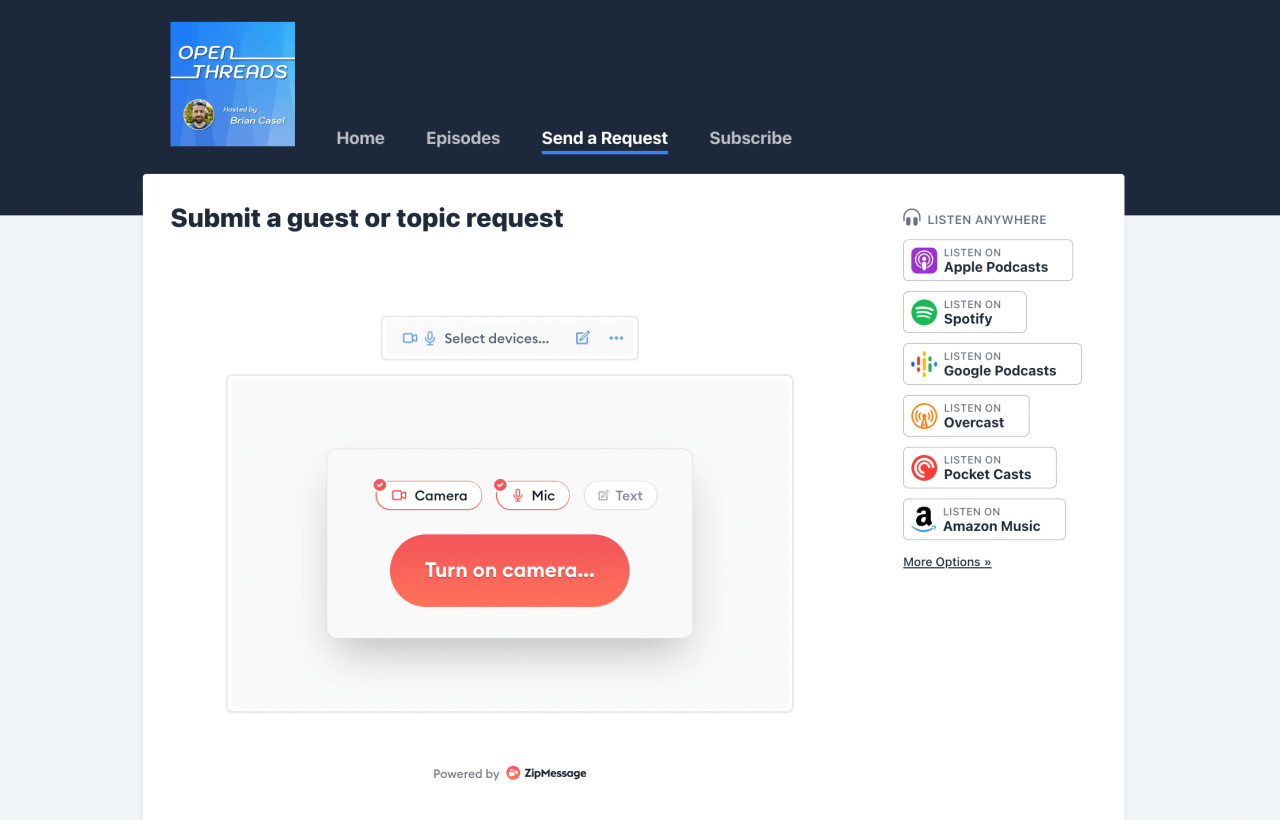
As it turns out, my product, ZipMessage, is perfect for this sorta thing. It lets anyone record and swap video/audio or text messages in a back-and-forth message thread. Creators, consultants, coaches, and product teams love it for communicating asynchronously with customers and teammates.
ZipMessage has a feature we call Intake Pages. You can share your intake page with anyone (or even embed them on your website… you see where this is going). Anyone can then record and submit a video, audio, or text message to you. You can then respond back in a new 1-to-1 message thread and keep the conversation going.
Set up your podcast listener questions line
Here’s the step-by-step guide to how I wired this up using my Transistor.fm-powered website and my ZipMessage intake page.
I should note, this works great on any other type of website too (like a WordPress site), but I must say, it couldn’t be easier than with Transistor’s simple page editor.
Step 1: Add a new page to your podcast website
Log into your Transistor.fm podcast dashboard, then click “Website”, then “Pages & Links”, then click the “New Page or Link +” button.
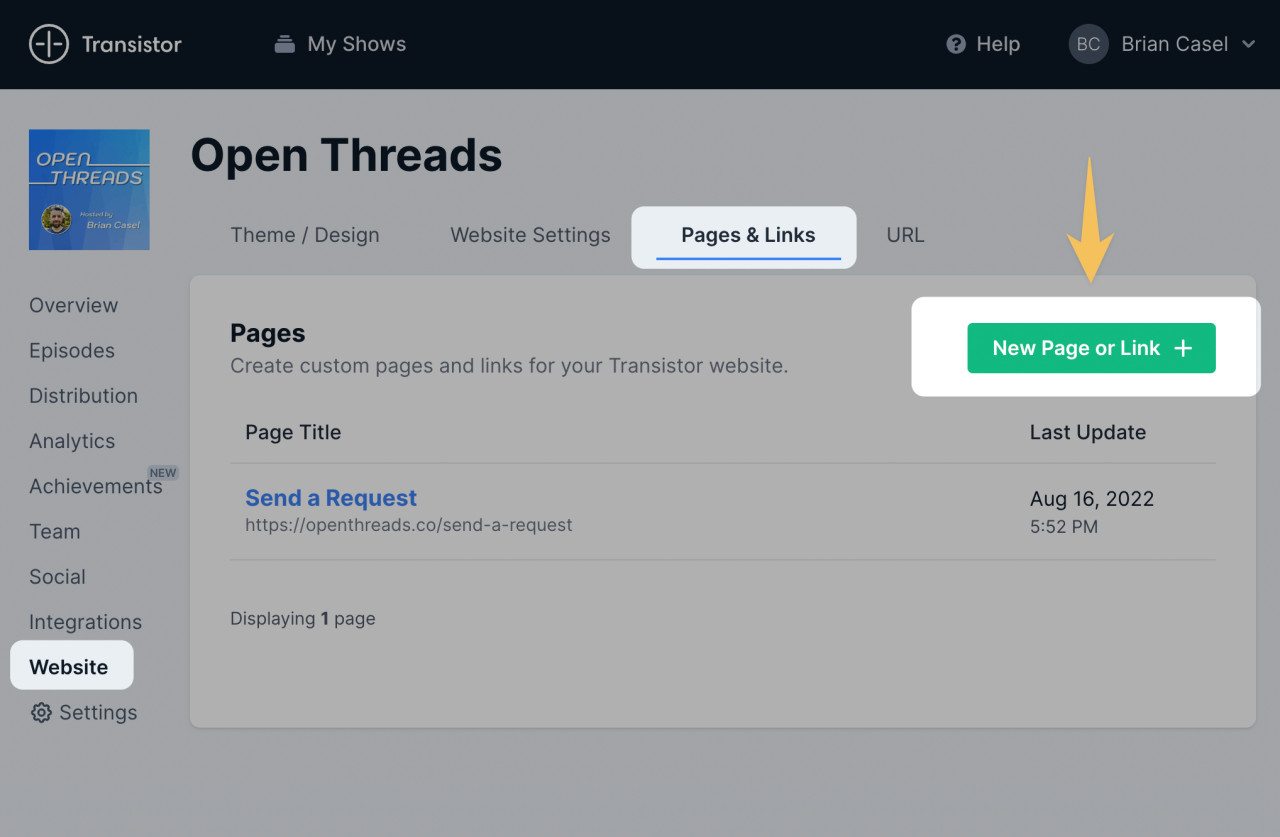
Step 2: Set the page title
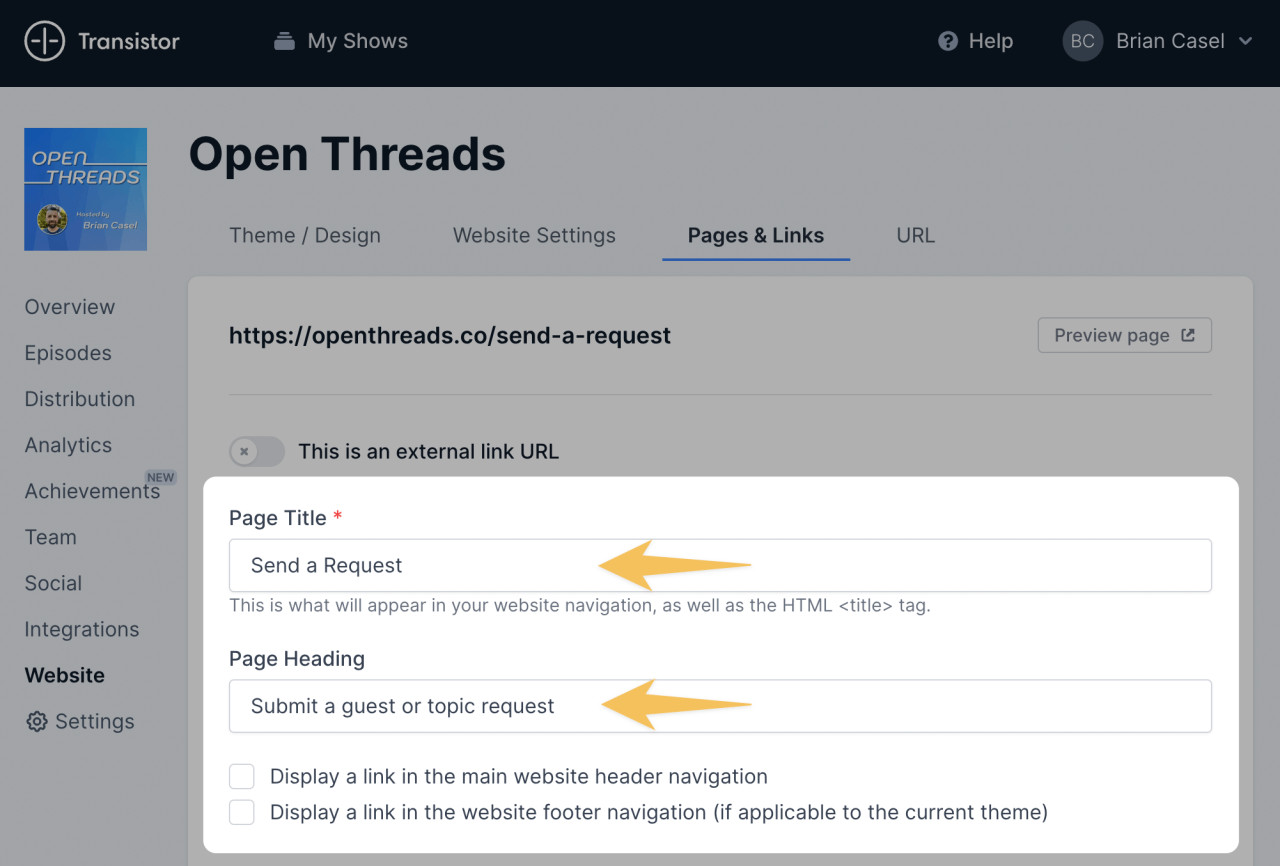
Give your new page a title (this will show in the navigation) and a headline. I went with “Send a Request” for the nav and “Submit a guest topic or request” for the headline.
For now, since the page isn’t ready to go live just yet, let’s leave the 2 checkbox for displaying the link publicly unchecked (for now).
Step 3: Create your ZipMessage Intake Page
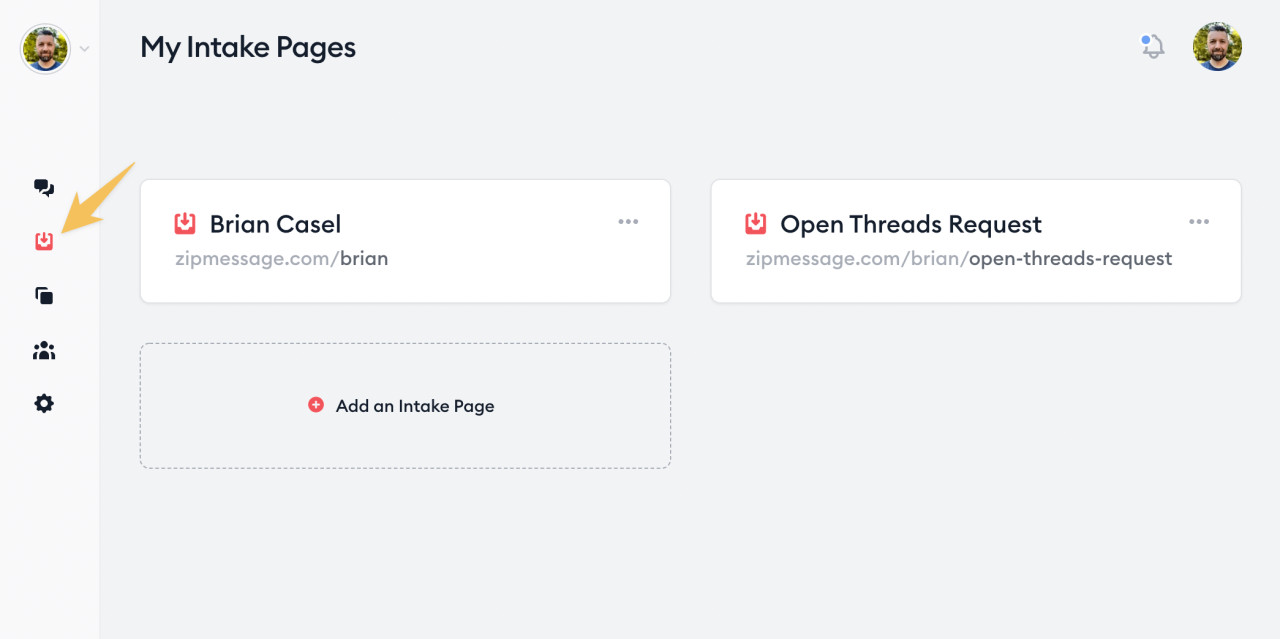
If you don’t have ZipMessage yet, grab your account (and reserve your branded URL while you’re at it!). Then click “Intake Pages”. You get one intake page by default, but you can add more. I created one specifically for my podcast listener questions.
Step 4: Set the “thank you” message
Next, let’s set up some options for our intake form.
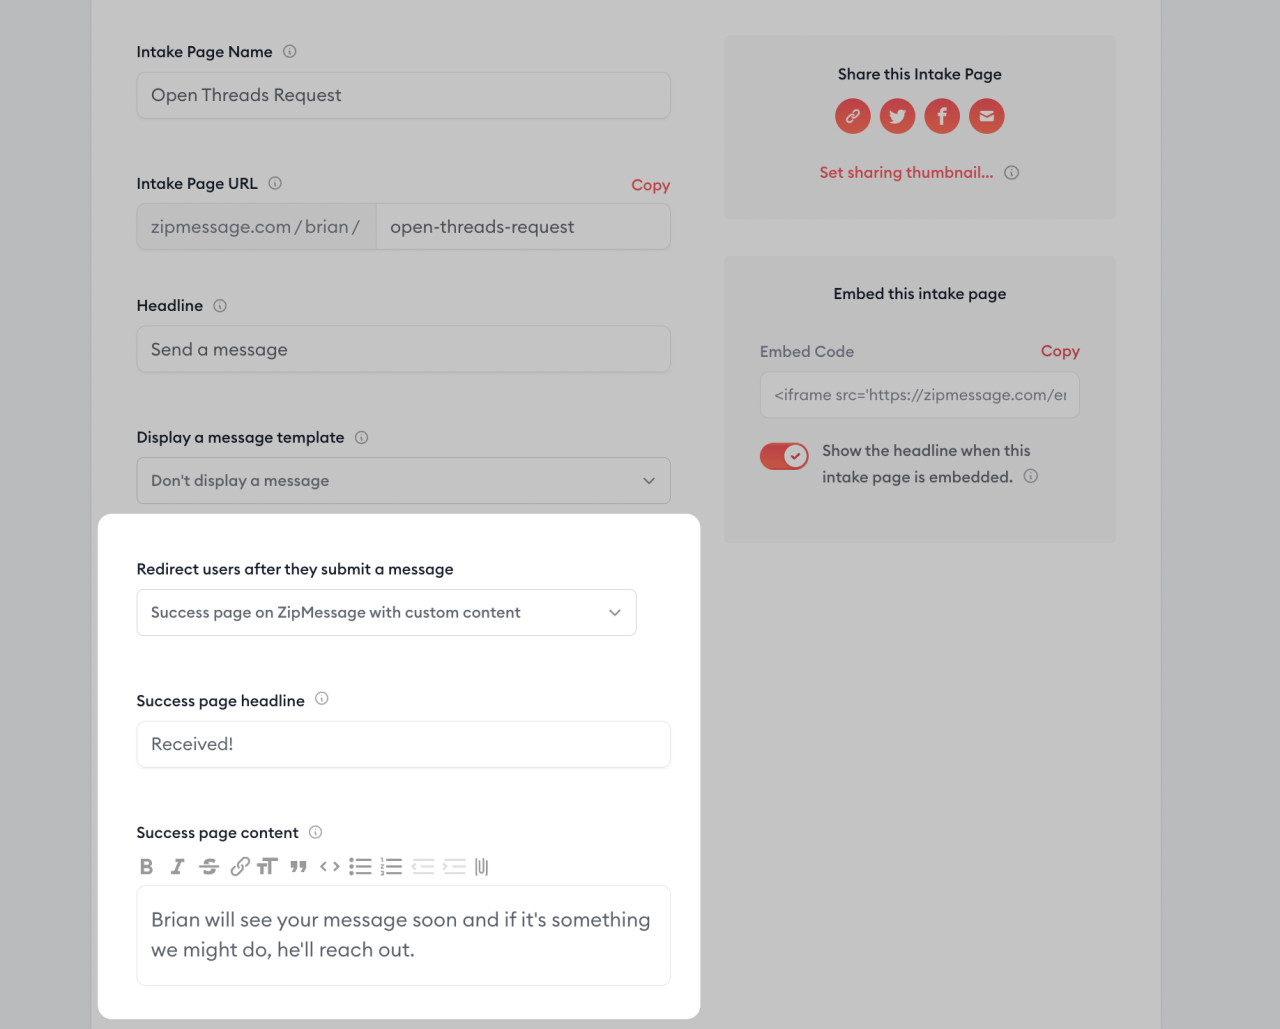
Since we’ll be embedding this page on our website (instead of sharing it directly), we won’t need to worry about the custom URL or public headline.
But we do want to configure what happens after a person submits their message. I chose to show listeners a simple “thank you” message. So I selected the option to show a “Success page on ZipMessage with custom content”.
Note: We also have the option to direct them straight into the async conversation that’s generated. But in this case, I’ll keep it simple and just thank them for their submission.
Step 5: Limit message recording options
We’re almost there! Just a few more settings to adjust how I want my listeners to record their messages.
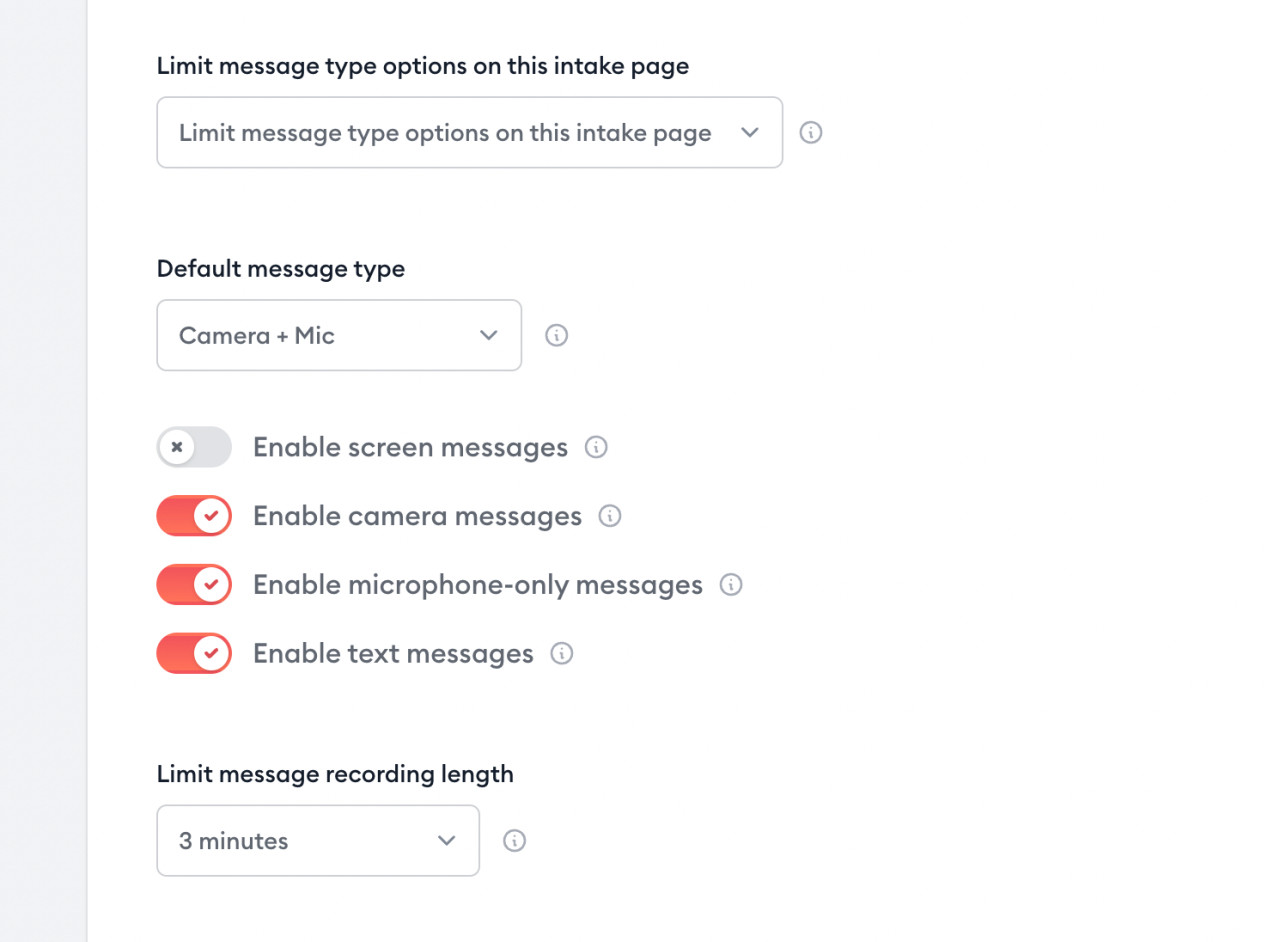
ZipMessage allows screen recording, but we won’t need that for podcast listener messages. So I’ll want to hide the screen recording option.
Next, I want my listeners to keep their messages brief! So I’ll set a time limit of 3 minutes for their recordings.
These are the intake page settings I used:
Step 6: Copy the embed code
Now we’re ready to grab the embed code for our intake page from ZipMessage.
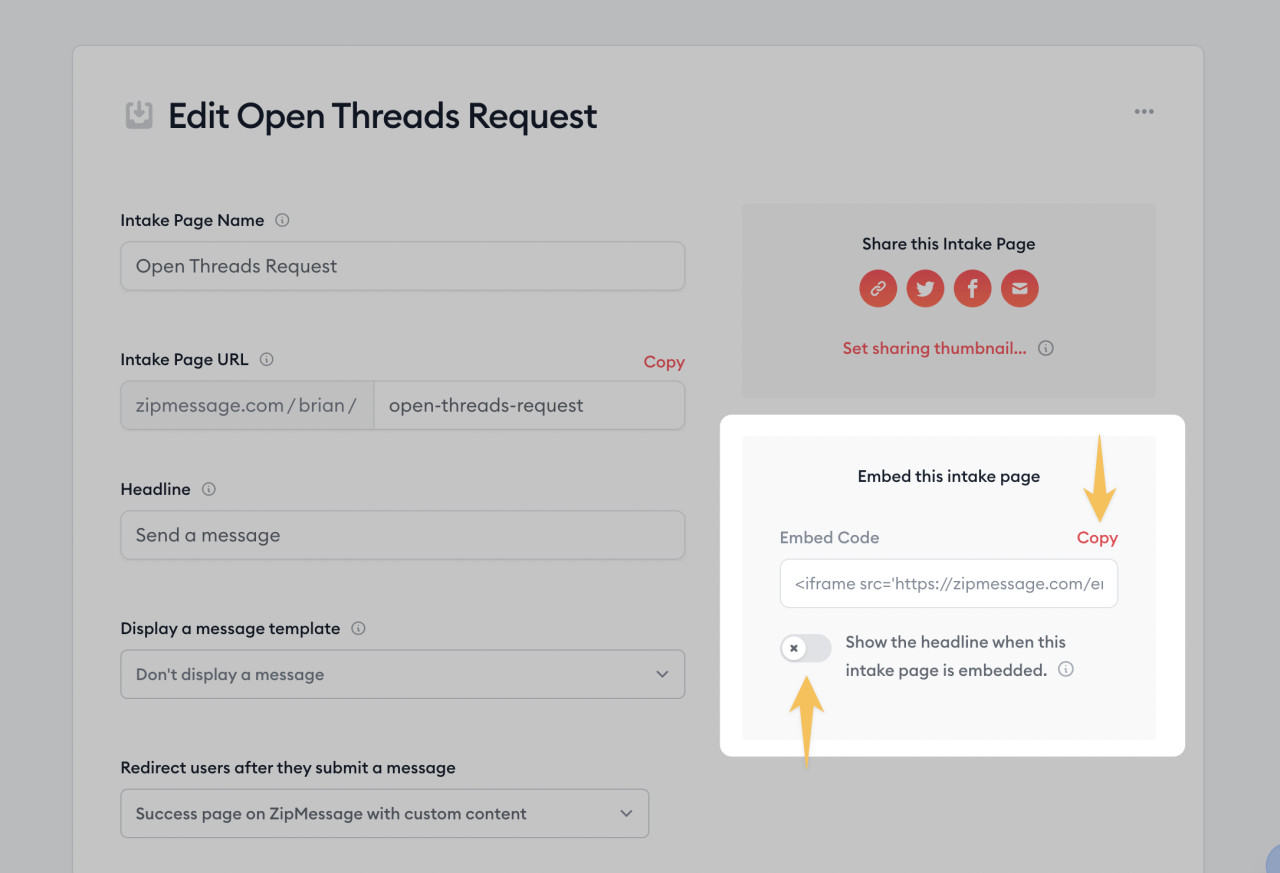
First, uncheck the box to display the headline on the intake page. Since we already have a page headline set in Transistor, we won’t need to display another headline from ZipMessage. So disable that option.
Then click “copy” to copy the embed code to your clipboard.
Step 7: Paste the embed code in your page in Transistor
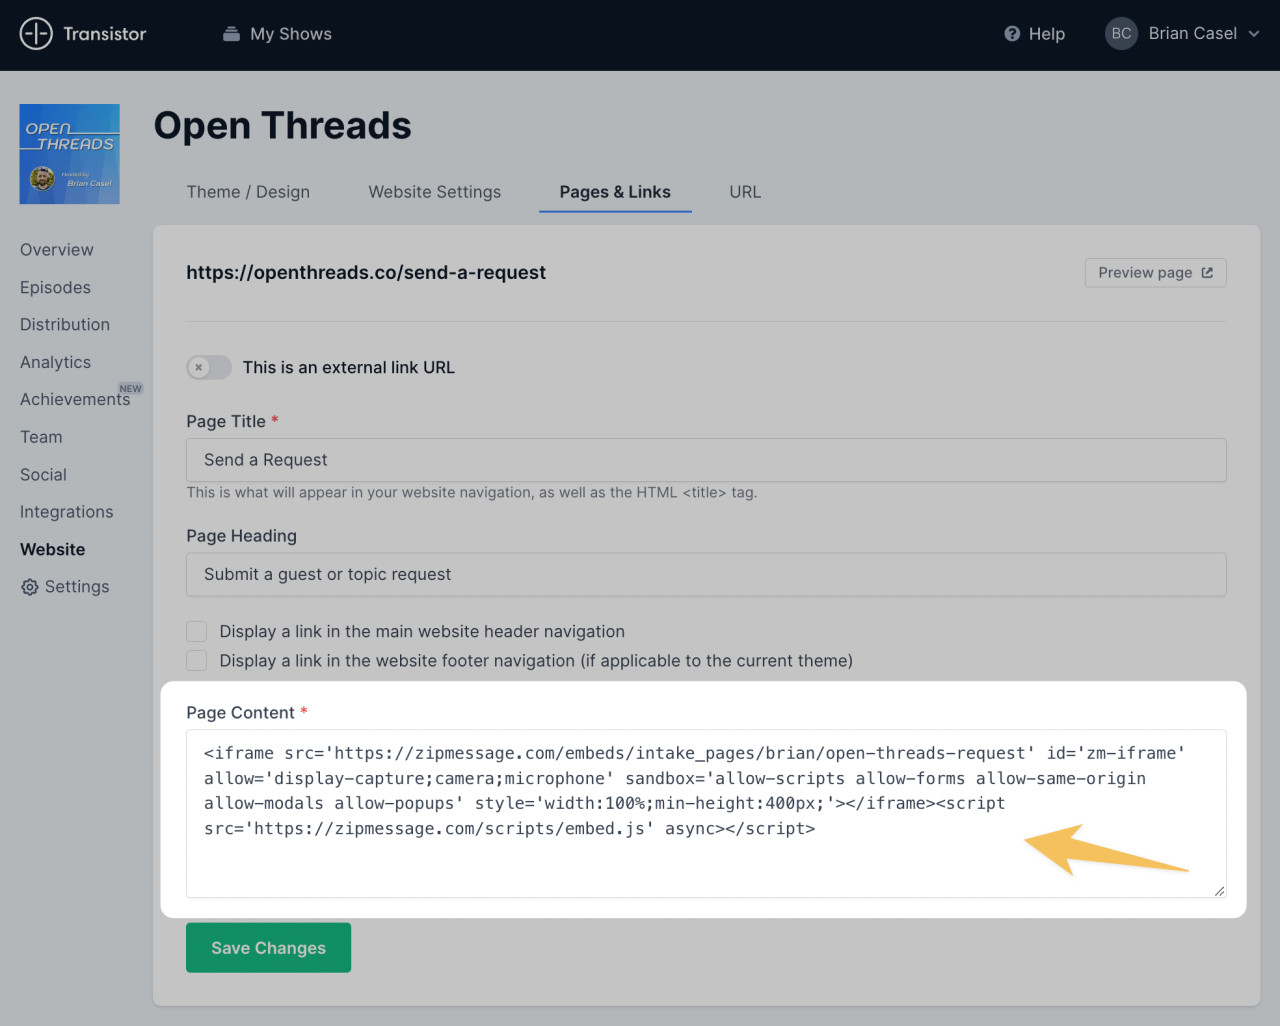
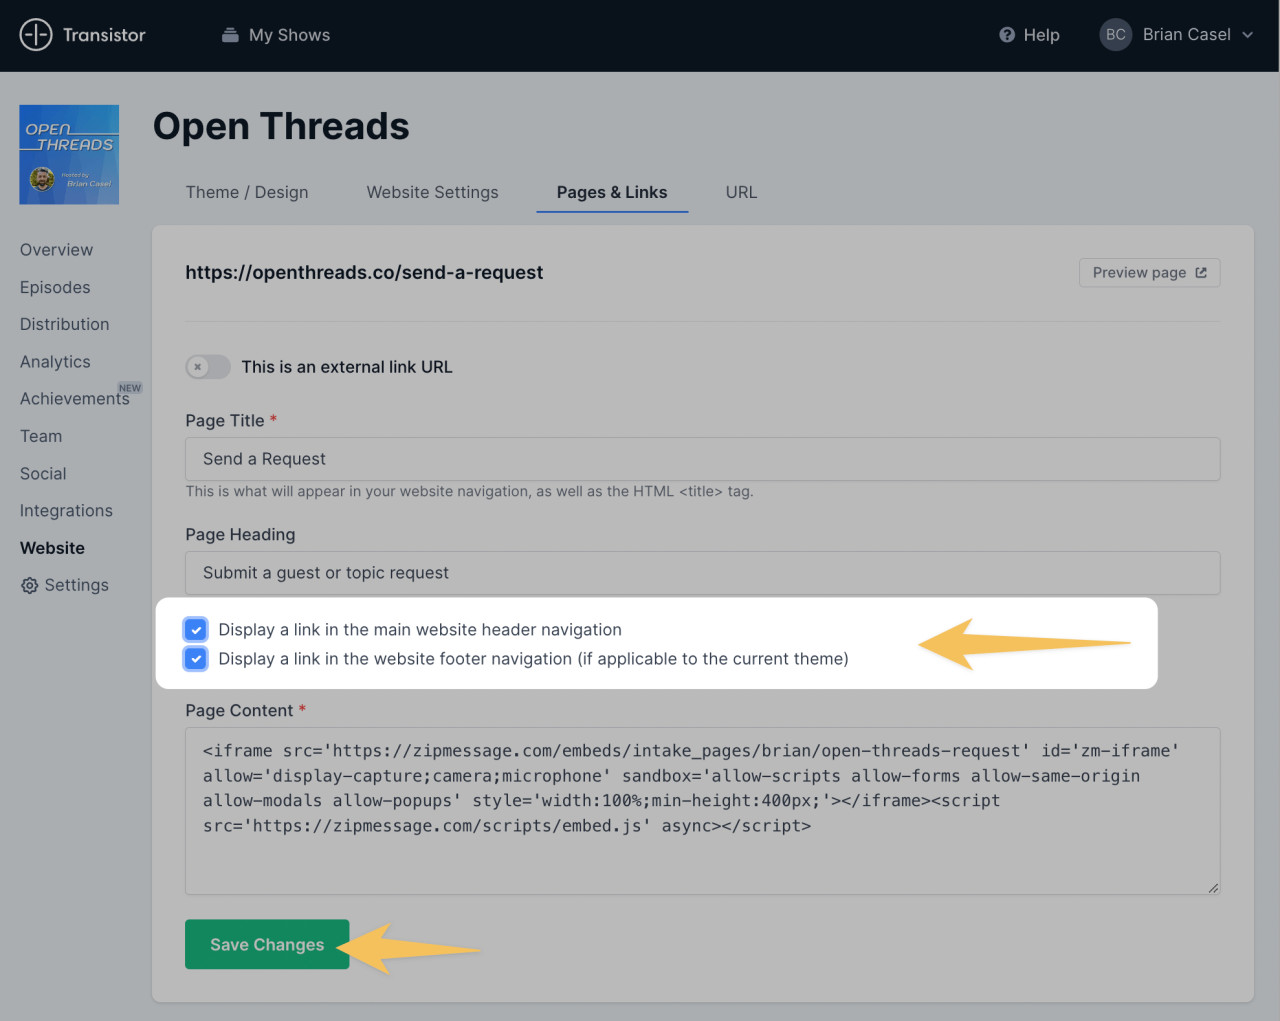
Now head back over to your Transistor website editor. In the box for “Page content”, paste the embed code you copied from ZipMessage.
Once published, this will display the intake page within the content of this page on your Transistor website.
Step 8: Publish your page!
Last step!
Now check those 2 boxes to display the link for this page in your main navigation and footer navigation. This effectively makes your “Submit a Request” page live!
Don’t forget to tell your audience about your new listener line! Talk it up in your next episode.
I hope you found this helpful!
If you haven’t done so already, be sure to fire up your podcast website with Transistor and your intake pages with ZipMessage so you can hook up your podcast listener feedback line before your next episode!

