How to Record and Publish a Podcast Using Riverside.fm and Transistor
Transistor Team
Recording a podcast with remote guests doesn't have to be complicated. With the right tools, you can create professional-quality episodes and distribute them to Apple Podcasts, Spotify, and more in just a few minutes.
In this guide, we'll walk through how to use Riverside.fm for recording and editing, then seamlessly publish your episode using Transistor's podcast hosting platform.
What You'll Learn
How to record high-quality remote podcast interviews in Riverside
Simple editing techniques to remove filler words and silence
Exporting with audio normalization for consistent volume
Seamlessly publishing to Transistor with one click
Getting your episode on Apple Podcasts, Spotify, and more
The Riverside + Transistor Workflow
What's Riverside.fm?
Riverside is an all-in-one recording and editing platform for your audio and video content. It captures high-quality audio from each participant locally, meaning your recordings won't be affected by internet connection issues.
Key features:
Separate audio tracks for each participant
Local recording for highest quality
Built-in editor for quick post-production
One-click publishing integration with Transistor
What's Transistor.fm?
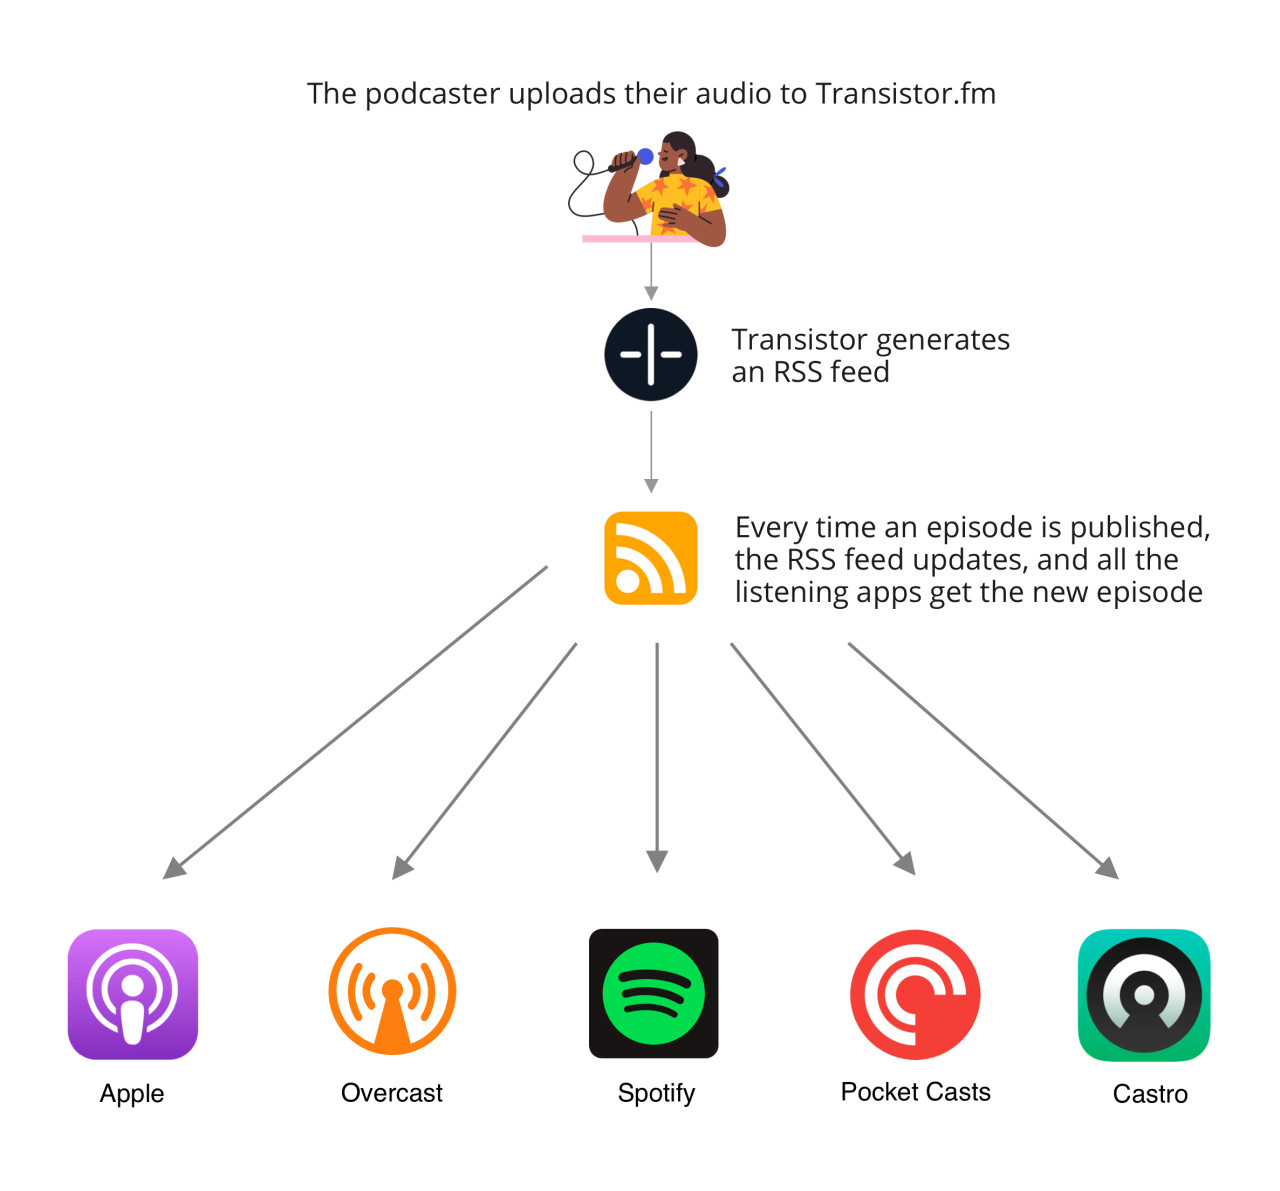
Transistor is a podcast hosting platform that helps you publish and distribute your audio files as a podcast. Once your episode is on Transistor, it can be automatically distributed to Apple Podcasts, Spotify, YouTube, and dozens of other podcast directories.
Step 1: Recording Your Podcast in Riverside
Note: Riverside requires you to use the Chrome browser
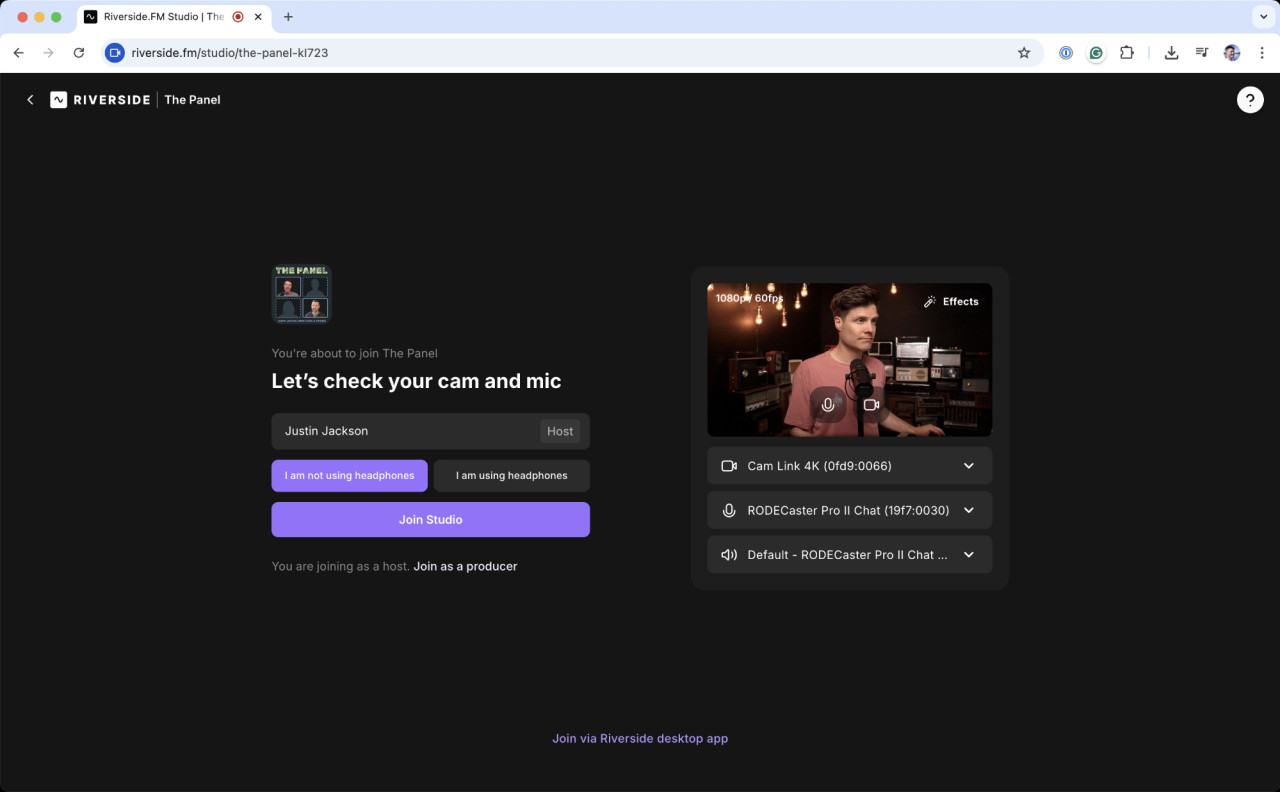
To start recording in Riverside:
Log into your Riverside account and click "Record"
You'll be brought into the studio interface
Select your microphone and camera settings
Click "Join the Studio"
Invite guests by sharing the studio link
When everyone is ready, hit record
During recording, Riverside captures both audio and video locally from each participant, ensuring the highest possible quality regardless of internet connection.
Step 2: Editing in Riverside's Interface
Once you've finished recording:
Wait for all files to upload to Riverside's servers
View your recording in the dashboard
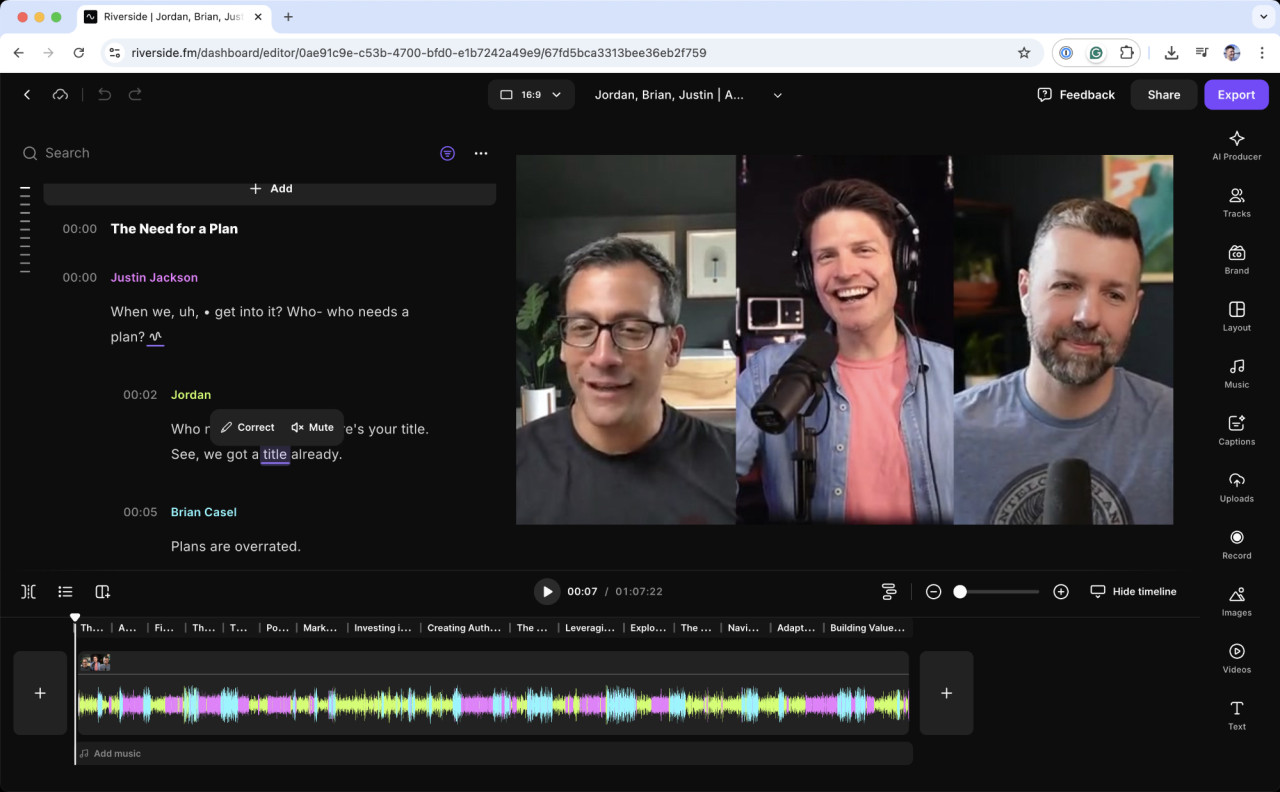
Click "Edit" to open Riverside's editing interface
Riverside offers two simple yet powerful ways to edit your episode:
Text-Based Editing:
A transcript of your recording lets you highlight and delete unwanted words
Perfect for removing filler words and awkward phrases
Timeline Editing:
Split and remove sections directly in the timeline
Ideal for cutting out long pauses or entire segments
Step 3: Exporting Your Episode
When your edits are complete:
Click the "Export" button
Choose "Audio Only" for a podcast episode
Select MP3 format
Enable "Normalize Audio" to ensure consistent volume levels
Optionally enable "Remove Background Noise" if needed
Click "Export" and wait for processing to complete
Step 4: Publishing to Transistor
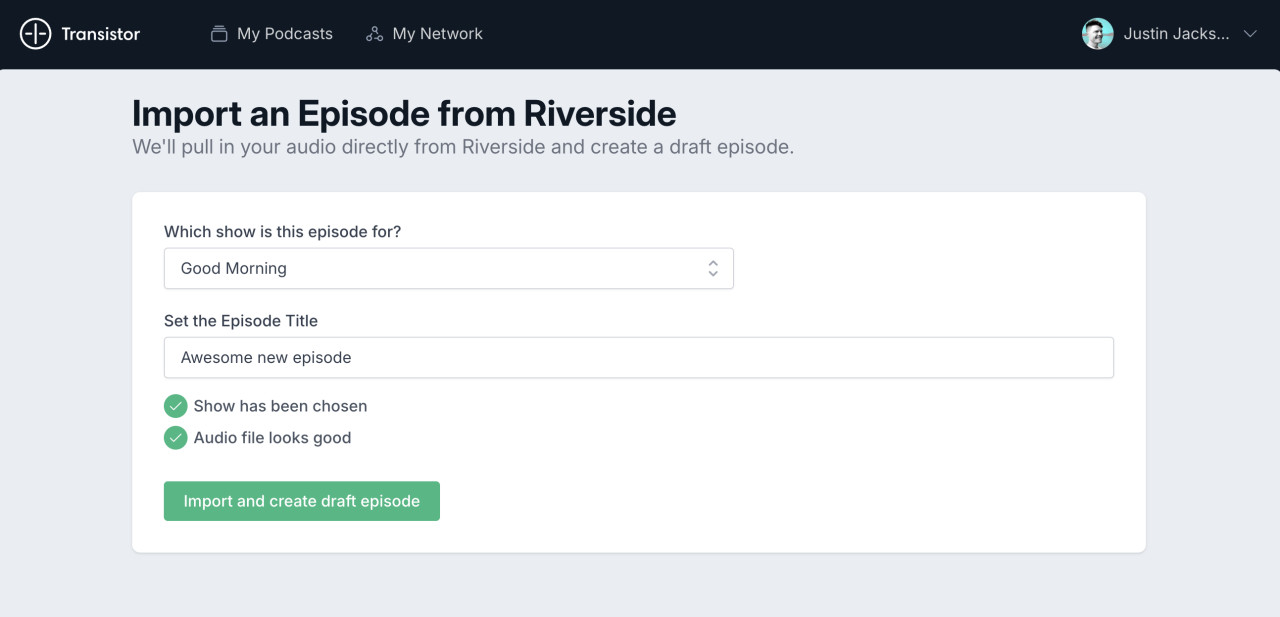
Here's where the magic happens:
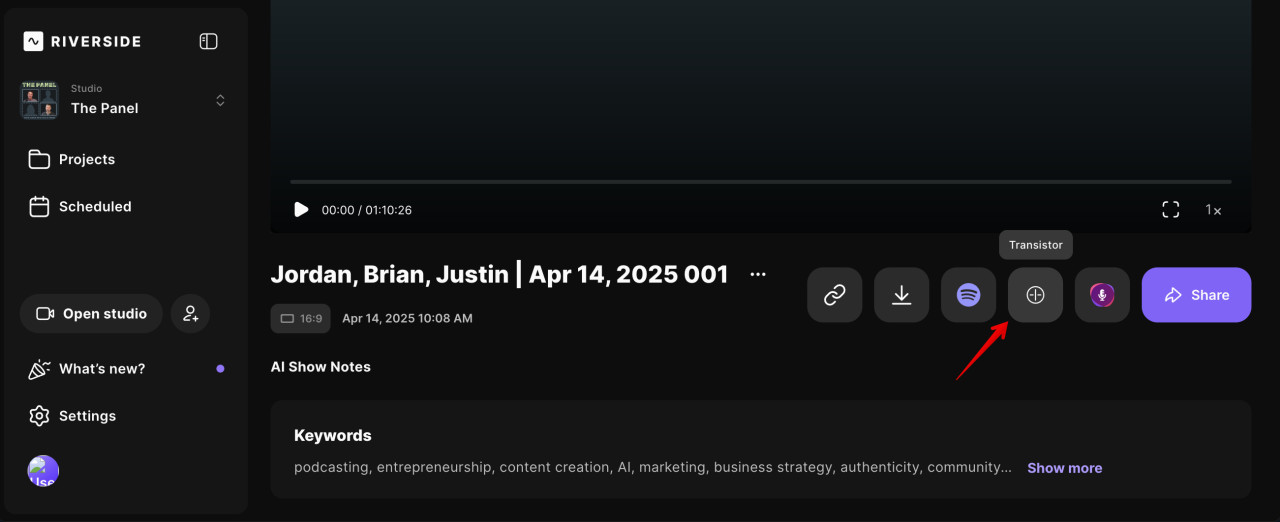
Once your export is ready, click "Preview and Share"
Look for the Transistor logo at the bottom of the sharing options
Click the Transistor button
Name your episode
Click "Export"
You'll be redirected to Transistor (you'll need a Transistor account at this point):
Choose which show this episode belongs to
The audio file will automatically be imported
Add your episode title, description, and artwork
Preview your episode to ensure everything sounds correct
Scroll down and click "Save and Publish Now"
That's it! Your episode is now published on Transistor and will automatically be distributed to all the podcast directories you've set up.
Why This Integration Works So Well
The Riverside + Transistor workflow eliminates the traditional hassles of podcast production:
No file transfers: Skip the downloading and uploading between platforms
Streamlined workflow: Record, edit, and publish all from the same interface
Easiest way to publish podcast episodes: Reach listeners on all major podcast platforms
Getting Started
To use this workflow, you'll need accounts with both Riverside and Transistor:
Transistor offers plans starting at $19/month, which includes unlimited podcast episodes, detailed analytics, a podcast website, and distribution to all major podcast directories.
Other Remote Recording Options
While we recommend Riverside for remote podcast recording, there are a few other options:
SquadCast: Another excellent web-based recording tool that captures separate audio tracks
Zoom: While not designed specifically for podcasting, Zoom can work well for casual recordings
Conclusion
Creating a professional podcast has never been easier. With Riverside's recording and editing capabilities combined with Transistor's hosting and distribution platform, you can focus on creating great content while the technical details are handled for you.
Have questions about podcast hosting or distribution? Check out our comprehensive guide to starting a podcast or contact our support team.